Setting Up Your Account for RSA Authentication

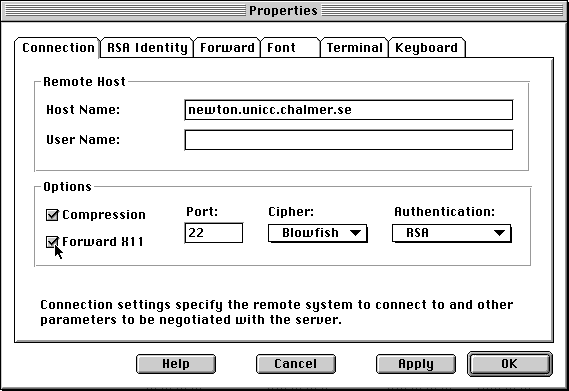
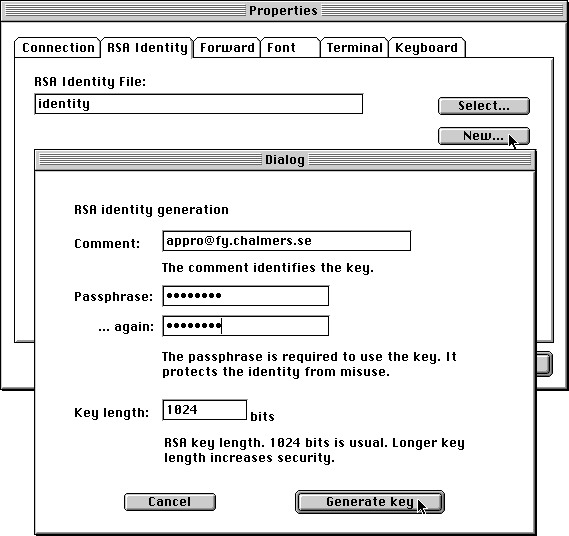
SSH protocol implements RSA authentication automatically. You create your personal RSA key pair by running the F-Secure SSH Key Generation Wizard during setup. The RSA identity files are saved to the installation directory, the private key in a file called identity and the public key in a file called identity.pub. You can then add the contents of the identity.pub file to the authorized_keys file on the remote host (normally, $HOME/.ssh/authorized_keys). Adding an RSA public key to the authorized_keys file:

  1. Connect to your account using password authentication.
  2. Select Edit | Properties | RSA Identity
  3. If the Comment field is empty, browse for the RSA identity file or create a new RSA identity by pressing the New button, then repeat step two. If the RSA Identity Comment field is non-empty go to step four.
  4. Press the Copy button to copy the RSA public key to the clipboard.
  5. Change to the .ssh directory in your home directory on the remote system.
  6. Load the authorized_keys file to a text editor. If the file does not exists, create it with a text editor.
  7. Paste the RSA public key from the clipboard to the end of the authorized_keys file. Be careful if your editor has automatic word wrapping, as the key must not be wrapped to several lines. The file has precisely one line per public key entry.
  8. Save the authorized_keys file and exit the text editor.

Note: Now the account is ready to be accessed using RSA authentication from a client machine that contains the correct RSA identity file (the private and the public key pair.)